
Replacing a failed LED driver is one of the most useful repairs a homeowner or small installer can do — it restores lighting, saves money, and avoids replacing whole fixtures. This guide explains how to replace LED driver safely and product-oriented: how to identify the right replacement, what to check on the old driver, step-by-step removal and installation, testing and troubleshooting, and what to ask suppliers so you don’t buy the wrong unit. I’ll also cover dimmer compatibility, smart drivers, warranties, disposal, and when to call a licensed electrician.
If you want to know how to replace LED driver and keep your lights working for years, read on — we’ll be practical, cautious, and precise.

Quick safety note (read before you touch anything)
Learning how to replace LED driver involves working with mains electricity. If you are not confident or licensed, stop and call a qualified electrician. Follow these non-negotiable safety rules:
- Turn off the circuit at the breaker and verify the circuit is de-energized with a non-contact voltage tester (verify the tester works on a live circuit first).
- If any part of the system is wet, corroded, or inaccessible without removing insulation or lifting ceilings, call a pro.
- If the driver has been hot, charred, smoking, or if you smell burning, do not re-energize — have a licensed electrician inspect for wiring faults.
- Use insulated tools and wear safety glasses.
Now — the practical stuff.
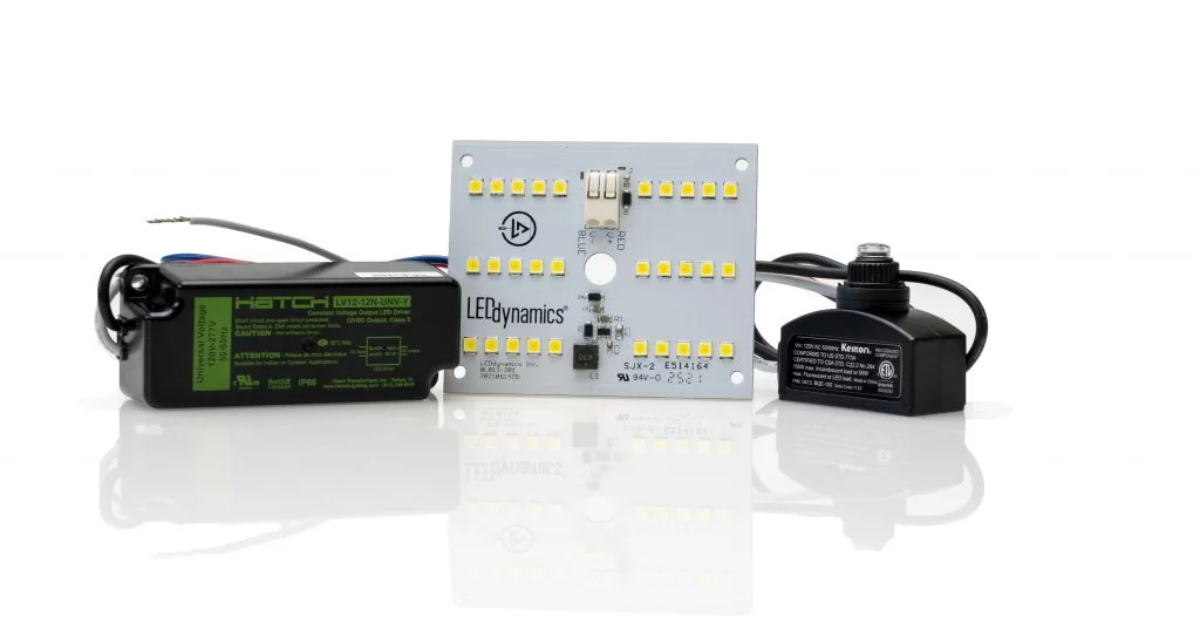
What an LED driver is (and why you might need to replace it)
An LED driver is the power supply that converts mains AC (e.g., 230VAC or 120VAC) into the correct DC output to run LED modules. Drivers come in two main types:
- Constant Current (CC) — supplies a fixed current (e.g., 350 mA, 700 mA). Use these with LED modules specified for a current.
- Constant Voltage (CV) — supplies a fixed voltage (e.g., 12V, 24V). Use with arrays or strips that expect a stable voltage.
You replace a driver when the LEDs are dark, but bulbs/modules are intact, when LEDs flicker, or when the driver shows signs of failure (smell, elevated temperature, visible damage). Replacing the driver often fixes the problem without replacing the entire luminaire.
Overview: the exact steps to learn how to replace LED driver
- Diagnose symptoms and confirm that the driver is at fault.
- Read the old driver label and document specs.
- Select a matching replacement (current, voltage, wattage, dimming type, IP rating).
- Gather tools and safety gear.
- Power down and verify zero voltage.
- Disconnect and remove the old driver.
- Install the new driver with the correct polarity and secure connections.
- Test with power and verify dimming/behavior.
- Seal, mount, and document the replacement.
We’ll expand each step below.
Step 1 — Diagnose: Is the driver really the problem?
Before you learn how to replace LED driver, confirm that the driver is the issue:
- Symptom A — All LEDs on the fixture are dark, but the fixture’s fuse/breaker is OK. Test continuity to the driver. If the driver has no output voltage, it’s suspect.
- Symptom B — LEDs flicker or strobe, especially on power-up or when dimmed. Could be a failing driver or a dimmer-driver mismatch.
- Symptom C — LEDs are dimmer than normal while input is normal. The driver may be in current-limit mode.
- Symptom D — Driver is hot or smells burnt. Replace immediately and check for wiring faults.
Tools for diagnosis: multimeter (AC & DC), non-contact voltage tester, clamp meter (for current checks), and a basic continuity tester.
Step 2 — Read & record the old driver label (critical)
The most common error when people learn how to replace LED driver is mismatching specs. Record everything on the old driver label:
- Input: voltage range (e.g., 100–240VAC, 50/60Hz), input current if shown.
- Output: type (constant current or constant voltage), DC voltage or current rating (e.g., 700 mA, 24 VDC), and max wattage (W).
- Dimming: Is it dimmable? Which protocol? (triac/leading-edge, trailing-edge/ELV, 0–10V, DALI, PWM, phase-cut, DMX).
- IP Rating/enclosure: IP20, IP65, etc. Important for outdoor or wet locations.
- Safety & certifications: CE, UL, ENEC, etc.
- Manufacturer & model — good to have when buying a direct replacement. Example brands: Philips, Mean Well, Osram.
If the label is missing or unreadable, you must measure or estimate the LED module requirements before replacing a driver — do not guess.
Step 3 — Choose a replacement driver: matching rules
When replacing a driver, you must match key specs. These are product-oriented rules you will use when purchasing a unit.
Constant Voltage (CV) LED modules
- Replace with a driver that has the same output voltage (±5% tolerance unless LED spec allows wider).
- Choose a driver with a wattage rating ≥ (total LED wattage) + 20% safety margin.
- Ensure IP rating matches environment (IP65 for damp/outdoor).
Constant Current (CC) LED modules
- Match the same output current exactly (e.g., 350 mA, 700 mA).
- The driver’s voltage range must cover the LED string forward voltage at the chosen current. The driver will list the output voltage range (e.g., 9–54VDC at 700 mA).
- Choose a driver with wattage capacity ≥ required (Voltage × Current) with a margin.
Dimming & controls
- If the original driver is dimmable, pick an identical dimming protocol. If you switch types (e.g., legacy triac to DALI), expect rewiring and control system changes.
- For smart homes, choose drivers compatible with the ecosystem/protocol (DALI-2, Zigbee-enabled drivers, Bluetooth mesh).
Other considerations
- Power factor: for larger installs, prefer PF ≥ 0.9.
- Surge protection: Integrated surge suppression is desirable for outdoor or unstable grids.
- Efficiency & thermal rating: higher efficiency reduces heat. Check case temp and derating curves if in a hot ceiling.
- Form factor: physically fits the junction box/fixture and has correct mounting points.
A sample buying spec line: “Replace old driver with constant current driver, 700 mA, 9–54 VDC output, 40 W minimum, dimmable (triac & 0–10V), IP20, model from Mean Well or equivalent, 5-year warranty.”
Step 4 — Tools, PPE & pre-work checklist
Tools you’ll need when you learn how to replace LED driver:
- Insulated screwdrivers and nut drivers.
- Multimeter (AC/DC voltage, continuity).
- Wire strippers, crimpers, cable ferrules, and insulated connectors (Wago or equivalent).
- Non-contact voltage tester.
- Heat-shrink tubing or appropriate junction box covers and silicone sealant (for IP-rated installs).
- Mounting hardware (screws, brackets).
- PPE: safety glasses, insulated gloves if you’re not fully confident.
Pre-work checklist:
- Power off at the breaker and label the circuit.
- Verify the absence of voltage at the fixture.
- Take photos of existing wiring and label wires (input L/N, earth, LED+/- or LED(I)/LED(V) as applicable).
- Have the replacement driver and spec sheet ready.
Step 5 — Removing the old driver (safe, step-by-step)
- Confirm power is off with a non-contact tester and then prove it with a multimeter.
- Open the fixture/junction box covering the driver.
- Photograph wiring layout for reference.
- Disconnect LED output wires first (so you don’t accidentally energize LEDs during rewire).
- Disconnect mains input (L, N, Earth) and any dimming/control wires, capping them safely.
- Unmount and remove the old driver.
Keep the old driver for reference and warranty claims (if you ordered a replacement and it’s the wrong spec).
Step 6 — Install the new driver correctly
- Confirm driver orientation and mounting position (don’t block ventilation).
- Secure driver with screws or brackets — ensure vibration-free mounting.
- Make mains connections: live (L) to live, neutral (N) to neutral, earth to earth — use proper connectors and ferrules.
- Connect dimmer/control wires according to the driver pinout (follow manual).
- Connect the LED output with the correct polarity and verify secure crimps or terminal screws.
- For outdoor fixtures, ensure all seals, gaskets, and cable glands are refitted to maintain the IP rating.
- Double-check all connections andensure that there are no loose strands that could short.
Remember: polarity matters for DC outputs; reversing polarity may damage LEDs or the river.
Step 7 — Power up and test (don’t skip measurements)
- Turn the power back on at the breaker.
- Measure driver input voltage and current to verify expected mains presence.
- Measure driver DC output (voltage and current, where safe and appropriate). For CC drivers, measure current to verify it matches spec (e.g., 700 mA).
- Observe LEDs: stable on, no flicker, no buzzing, smooth dimming if applicable.
- Test dimming across the range and check for noise or strobing.
- Recheck driver’s case temperature after 15–30 minutes (it will be warm, but should not be excessively hot beyond spec).
If anything looks abnormal (smoke, smell, instability), turn the power off immediately and re-check the wiring or call a pro.
Troubleshooting common post-replacement issues
- Flicker when dimming: check dimmer compatibility and switch to an LED-rated dimmer or use the driver’s recommended dimmer list.
- Only partial LEDs lit or uneven brightness: verify LED string continuity, and that driver voltage range covers the string’s forward voltage.
- Driver trips or blows breaker: possible short circuit or driver overloaded — recheck wiring polarity and load calculations.
- Driver overheating in enclosed space: provide ventilation or select a driver witha higher ambient temperature rating or derating curve.
Dimming conversion & smart upgrade advice
If you want to change the dimming type when you how to replace LED driver, e.g., move from legacy triac to wireless dimming:
- A straightforward swap from a triac driver to a DALI driver requires a compatible DALI controller and rewiring of the control interface.
- For a smart home, choose drivers with integrated Bluetooth Mesh, Zigbee, or DALI-2 compatibility to connect to hubs.
- Always ensure the control protocol supports the fixture count on the circuit.
Converting dimming systems can be an upgrade opportunity — but it increases complexity and may be best handled by an electrician.
Disposal, warranty, and record keeping
- Keep the old driver for warranty evidence only if the manufacturer requires return. Otherwise, dispose of at an e-waste/electronics recycling facility.
- Record the replacement details: model, serial, date, installer name, and voltage/current specs — store photos and invoice for warranty.
- Many reputable drivers from brands such as Mean Well offer multi-year warranties; register the product if required.
Buying checklist — what to ask suppliers (copy/paste)
Use this RFQ snippet when you look for a replacement and want to avoid mistakes:
“Supply 1 × constant-current LED driver, 700 mA, output 9–54 Vdc, wattage ≥40 W, dimmable triac & 0–10V, input 100–277 Vac, IP20 (or IP65 for outdoor), surge protection, PF ≥ 0.9, brand options: Mean Well or equivalent, 5-year warranty. Provide datasheet and wiring diagram.”
Modify specs to match your fixture.
When not to replace the driver yourself
- The fixture is recessed in a high ceiling or requires scaffold access.
- The driver is embedded/sealed within a fixture with no safe access — replacing may void warranty.
- You find evidence of fire, water damage, or corroded connections.
- The building code or insurance requires a certified electrician for such work.
In these cases, calling a licensed electrician is the safe choice.
Cost & time estimate
- Parts: replacement LED drivers typically cost ₹500–₹5,000+, depending on specs, brand, and dimming features.
- Tools: basic electrician kit if you don’t already have one ≈ , ₹1,000–₹3,000.
- Labor (electrician): ₹1,000–₹6,000 depending on location and complexity.
- Time: a straightforward replacement (accessible fixture, matching driver) often takes 30–90 minutes for a skilled person.
Frequently Asked Questions
Q: Can I use a higher current driver if I wire resistors?
A: No. Always match the LED module’s specified current for CC systems. Don’t use resistors as a workaround — use a driver with the correct current rating.
Q: Can I replace an old sealed driver with a modern, more efficient one?
A: Yes — if the new driver fits, matches specs, and is rated for the same environment (IP rating, temperature). Verify dimming & control compatibility.
Q: Are all LED drivers universal input 100–277 Vac?
A: Many are, but not all. Always verify the input range on the datasheet.
Final checklist — before you power on
- Replacement driver matches current/voltage and wattage specs.
- Dimming protocol compatibility confirmed.
- IP rating appropriate for installation.
- All connections are secure with the correct ferrules/terminals.
- Old driver removed and disposed of at the e-waste facility.
- Photos and installation notes recorded for warranty.
Closing notes
Knowing how to replace LED driver is a valuable skill for maintaining modern lighting. When you follow the steps above — diagnose, match specs, install carefully, and test thoroughly — you’ll save money and keep fixtures working longer. Always prioritize safety: if something is awkward, inaccessible, or shows signs of electrical damage, get a licensed electrician involved.